Hi, I’m back. I’ve got a level 90 monk now (and going 1-90 before two of our usual raiding crew could go 85-90, although not quite in time to beat Lizzy) and I’ve had time to catch my breath in between a billion dailies I don’t feel a visceral urge to do, so I figured I’d use it to get back to bloggin’.
My offspec - possibly my main spec, depending on how rosters shake out - is mistweaver. I’ve made no secret of the fact that I want to heal on my monk; I find it super-interesting, especially compared to the kinda clockwork DPS setup, but the other weird thing about healing is how difficult it is to find a good opportunity to heal in a group setting.
Low-level dungeons are so non-taxing that it’s often a non-issue figuring out how they work - Blizzard essentially knew this when building mistweavers, as all you have for party heals between 10 and 32 is Soothing Mist and Eminence heals, aka “DPS heals,” aka fistweaving. It’s more than sufficient, but low-level groups move so fast and take so little damage it’s like hardly healing at all. (Side note: low-level mistweavers? Quit spamming Soothing Mist! Get in there and hit something! Soothing Mist spam for 22 levels is mind-numbingly boring!)
High-level dungeons? Also no good. Healers are pretty much expected to have come up learning to heal, so unless you can snag guild groups basically all the time, it can be a real trial by fire. And sometimes a trial by vote kick. Not fun.
So what’s a new high-level healer to do? If only there was some kind of training dummy for healers (granted, Proving Grounds might be this if they ever go in, but I digress)–oh wait, there is! He’s lean, he’s green, he’s not too mean… and he drops loot-filled pumpkins.
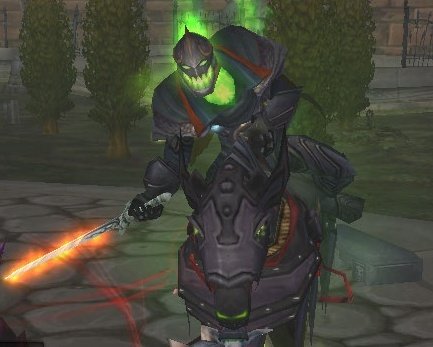
If you’re a new healer, the Headless Horseman - the Hallow’s End special boss - is probably one of the best chances to learn how to heal a group in a low-stress environment.
He’s got three phases and two transition phases, each of which is usually looked at in terms of the damage you do or take, but which can just as easily be examined in terms of the amount of damage people will take.
- Phase 1: Low, steady damage. This is the simplest phase to heal, and the one in which you settle into your rhythm, possibly storing up resources for later. The only people taking damage are the tank and any DPS dumb enough to stand in front (p.s. did you know the Headless Horseman cleaves? I forgot until this year, when I got hit by it). For this phase, mostly focus on using your most basic abilities, and if you have a resource you can store for later without impacting your mana, go for it. This is basically the “hold steady” phase, where no one’s truly in danger and you’re using little mana.
- Transition 1: Little to no damage. The Horseman’s Head pops off and everyone shoots it instead, while the body goes whirlwinding at it. There’s usually no damage (and even people in the whirlwind don’t take much), so this is a good time to, say, top off people, do a little damage on the head, or other maintenance tasks like mana restoration while people aren’t being damaged.
- Phase 2: Steady damage, but occasional spikes. In this phase, it’s basically phase 1, but the Horseman starts tossing pumpkins at people and briefly disorienting them while they take some fire damage. This can include you! You’ll want to dip into your other tools here; for instance, you might need to drop a bigger heal on the tank if it’s you that gets Conflagrated, or you might have lost a bit of health yourself and need to hit a self-heal, or so on. You’re using a few more tools than the base set, but things still aren’t too hectic. (Getting Conflagrated repeatedly is annoying, though.)
- Transition 2: Second verse, same as the first. Pretty much the same as phase 1. Conserve mana, though.
- Phase 3: All Hell breaks l–I mean, AOE healing and cleansing necessary. Phase 3 combines the normal melee from phase 1 and the conflagrate from phase 2 with two new, related elements: pumpkin soldiers and their punny debuff, Squash Soul. You definitely don’t want this on the tank, but since the odds are good that every DPS is going to be unintentionally tanking a pumpkin (you might be too, for that matter!) then here’s where you might have to break out those AOE heals and cleanses. Don’t throw them around willy-nilly - in this new world of set amounts of mana, you’ll be scraping the bottom of the barrel if you do - but don’t be afraid to break out the big guns to heal everyone at once.
- Final Transition: Cleanup. At this point, you will be in two situations: either you’ll be running fine, or be running on fumes. The pumpkins will probably still be around, but the Horseman himself will be whirlwinding after his body, so the majority of the damage won’t be him. Just keep everyone alive long enough to burn the head down and you win.
Now, granted, the Horseman is not representative of many trickier dungeon encounters, and experienced healers aren’t going to get a lot out of this. However, it does have a flow reminiscent of many encounters - tank damage, group damage, lots of damage, with breaks in between. You get a feel for how to play your class and flex the tools in your healing toolbox, as well as how to best stretch out your limited mana without breaking your magical budget. You can learn what to do in certain situations common to everyday healing - how do I help the tank hold steady? What do I do to cover damage spikes? What do I do if everything is going wrong? What’s my mana recovery mechanism? - but you can do it in a situation where the group is extremely unlikely to wipe.
Until Blizzard invents an actual “healing training dummy,” the Headless Horseman encounter is about as close as it gets - so if you’re brand new to healing, don’t be afraid to click that plus symbol in LFD and give it a shot.